## GPIO Zero 101
miroslav.binas@tuke.sk / [**IT Akadémia**](http://itakademia.sk/sk/domov/)
## GPIO Zero
* a **friendly** Python API/library for physical computing
* created to **simplify** the process of physical computing, **helping** new coders to learn (and have fun)
## GPIO Zero features
* works with electronic components as Python objects
* support for plenty eletronic components - `LED()`, `RGBLED()`, `PWMLED()`, `Button()`, `PiCamera()`, `LEDBoard()`, `LEDBarGraph()`, `TrafficLights()`, `Buzzer()`, `MotionSensor()`, `LightSensor()`, `DistanceSensor()`, `Motor()`, `Robot()`, ...
## GPIO Pins
* GPIO - General-Purpose Input/Output
* most models of the Raspberry Pi have _40_ pins
* 26 are GPIO pins
* the others are power or ground pins
* these pins are a physical interface between the Raspberry Pi and the outside world
* pins numbering
* GPIO numbering
* physical numbering
Note:
* https://www.futurelearn.com/courses/physical-computing-raspberry-pi-python/6/steps/348254
## GPIO Pinout
[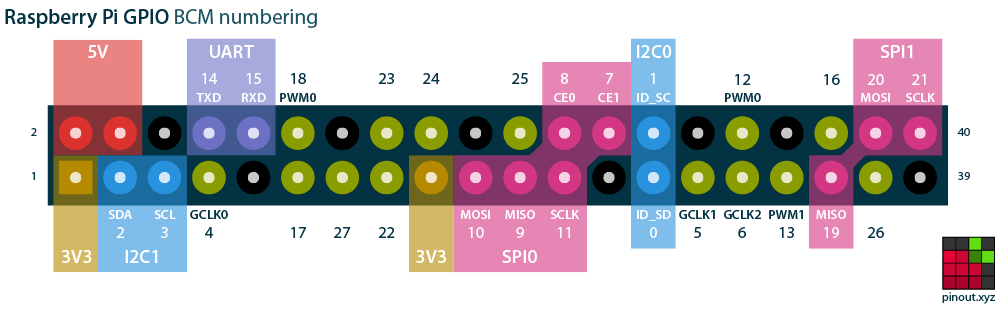](https://pinout.xyz/#)
Note:
* https://pinout.xyz/#
## GPIO Pin Numbering

Note:
* https://gpiozero.readthedocs.io/en/stable/recipes.html
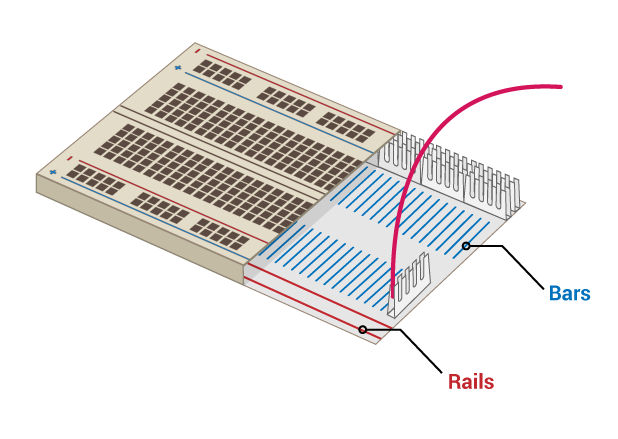
## Breadboard
Note:
* way of connecting
* https://www.futurelearn.com/courses/physical-computing-raspberry-pi-python/6/steps/348257
## LED

Note:
* cathode is always something missing - either leg (it's shorter) or flat head
* https://www.futurelearn.com/courses/physical-computing-raspberry-pi-python/6/steps/348257
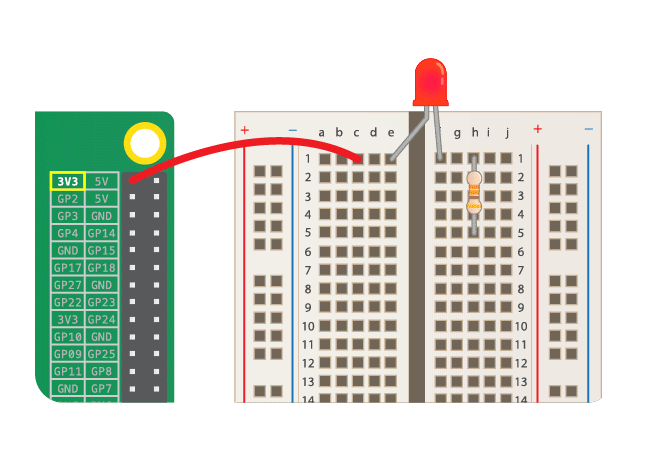
## Simple Circuit
Note:
* Never connect LED alone! Always with resistor!
* LED should light, when connected. If not, check it's orientation.
* https://www.futurelearn.com/courses/physical-computing-raspberry-pi-python/6/steps/348257
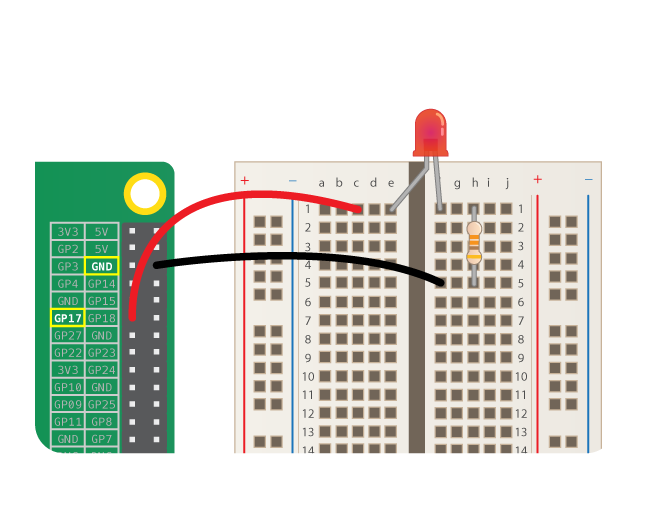
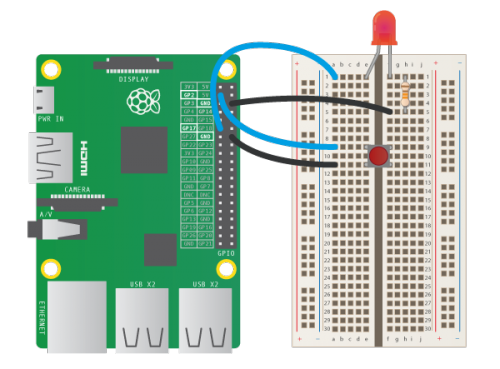
## Switching LED
Note:
* Connect the pin to GP17.
* The LED will not automaticaly turn on - we will code the behaviour.
* https://www.futurelearn.com/courses/physical-computing-raspberry-pi-python/6/steps/348257
## Blink Code
```python
from gpiozero import LED
from time import sleep
led = LED(17)
while True:
led.on()
sleep(1)
led.off()
sleep(1)
```
## 2. Getting Input from Button
## Getting Input from Button
```python
from gpiozero import Button
button = Button(2)
button.wait_for_press()
print('You pushed me')
```
## Controlling LED
Note:
* https://www.raspberrypi.org/blog/gpio-zero-a-friendly-python-api-for-physical-computing/
```python
from gpiozero import LED, Button
from time import sleep
led = LED(17)
button = Button(2)
while True:
button.wait_for_press()
led.toggle()
sleep(0.5)
```
Note:
* https://projects.raspberrypi.org/en/projects/physical-computing/10
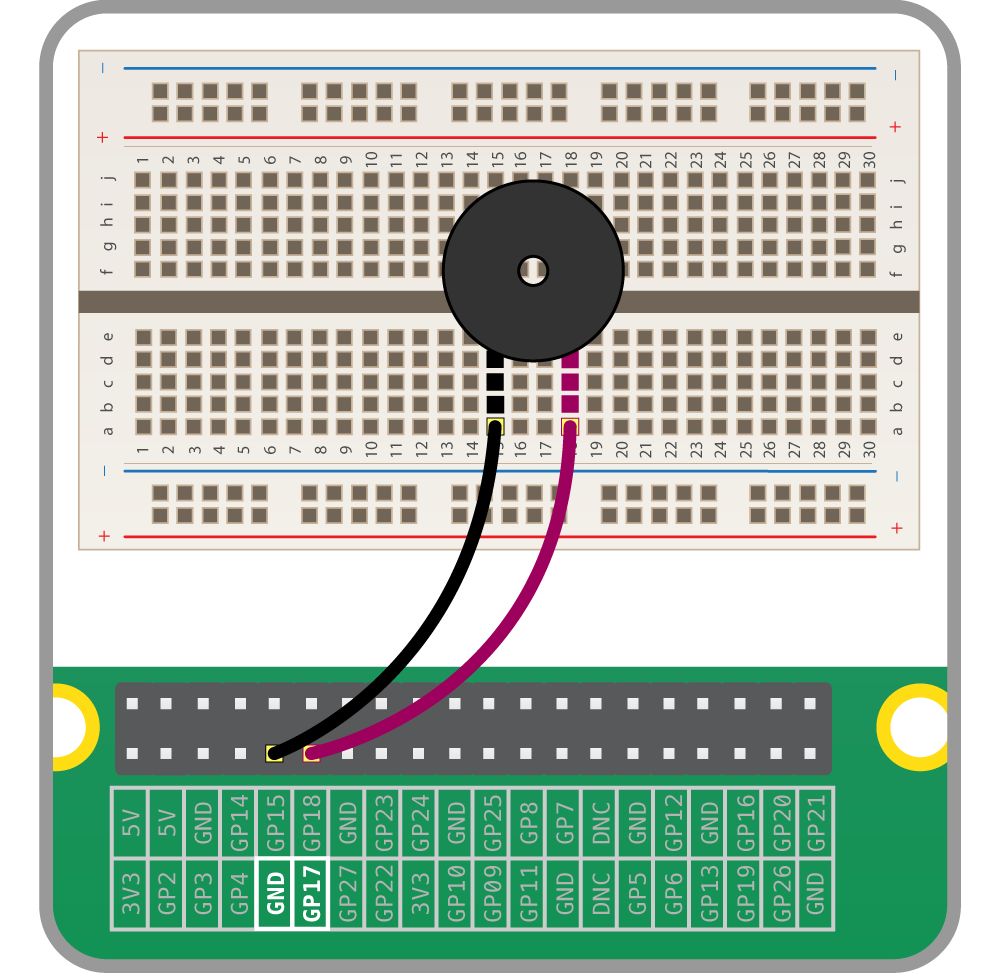
```python
from gpiozero import Buzzer
from time import sleep
buzzer = Buzzer(17)
while True:
buzzer.on()
sleep(1)
buzzer.off()
sleep(1)
# insted you can used
# buzzer.beep()
```
## 4. Passive Infra Red sensor (PIR)
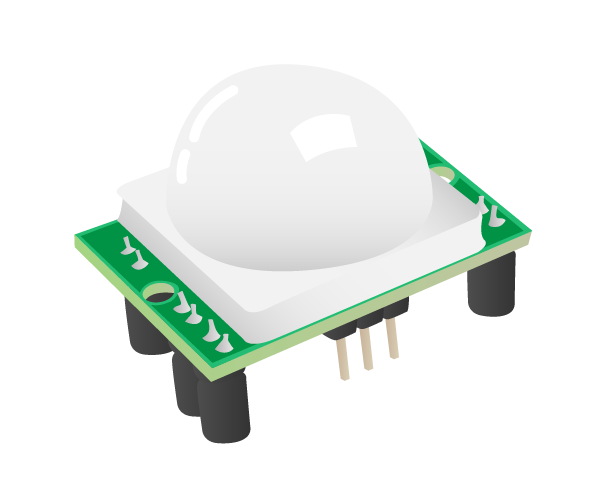
Note:
* https://www.futurelearn.com/courses/physical-computing-raspberry-pi-python/6/steps/348267
Note:
* https://projects.raspberrypi.org/en/projects/physical-computing/13
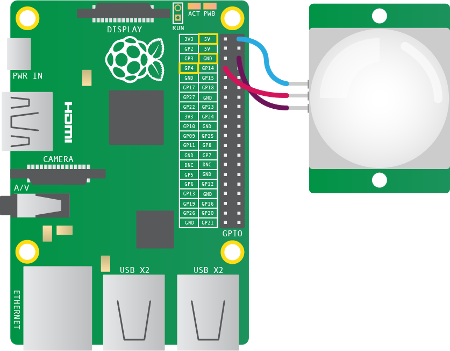
## Detecting Motion
```python
from gpiozero import MotionSensor
pir = MotionSensor(4)
while True:
pir.wait_for_motion()
print("You moved")
pir.wait_for_no_motion()
```
Note:
* https://projects.raspberrypi.org/en/projects/physical-computing/13
Note:
* https://www.futurelearn.com/courses/physical-computing-raspberry-pi-python/6/steps/348267
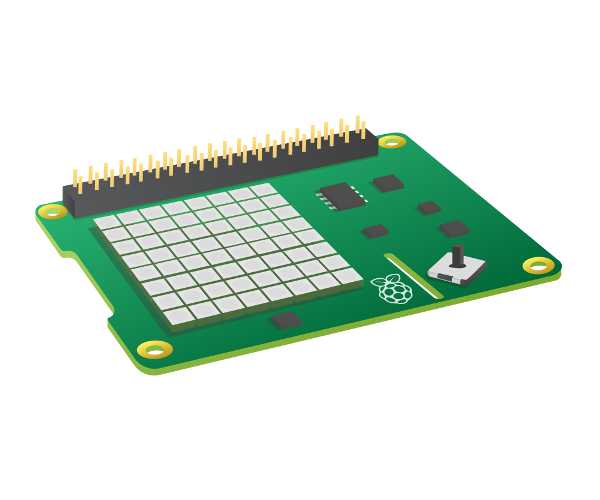
## Sense Hat Components
* a gyroscope
* an accelerometer
* a magnetometer
* a temperature sensor
* a humidity sensor
* a pressure sensor (a barometer)

(**http://bit.ly/2OnM7tI**)